

Uploading Import Files
Use the New Import wizard to upload one or more files for a facility. Coyote detects file types, assigns bays and pipelines, and creates an import session for the production day.
Before you start
- Confirm the correct facility is selected in the app header.
- Export files from your terminal or producer systems for the day you are importing.
- Name bay files clearly when possible (for example
Bay2_20260115.txt) so Coyote can suggest the right bay. - Ensure the facility has timezone and operational cycle start configured under Facilities.
You need the import upload permission (facility:imports:upload).
Step 1 — Open the upload wizard
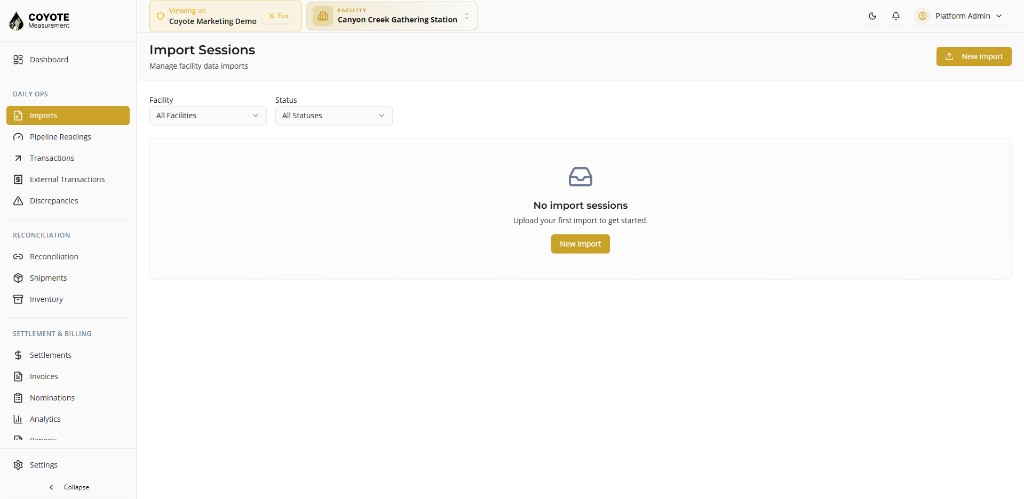
- Go to Imports in the sidebar.
- Click New Import.
- You are taken to the unified upload page.
Step 2 — Select facility and add files
- Choose the facility (terminal) for these files.
- Drag and drop files or use the file picker to add:
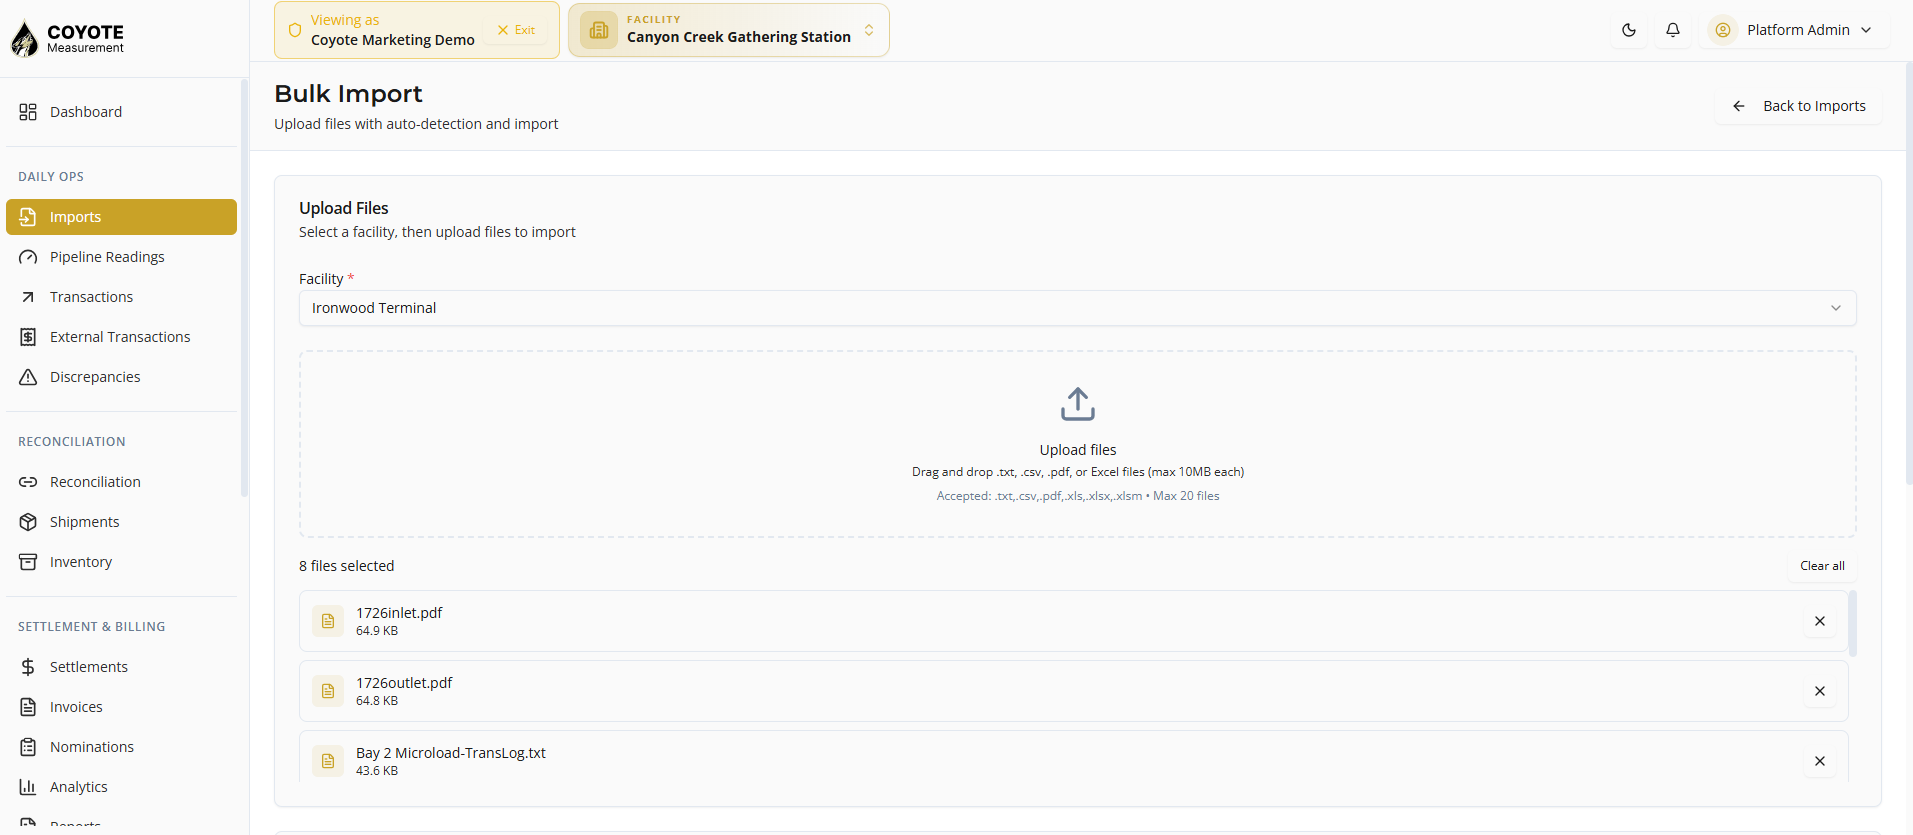
- Add every file for the same import run before continuing:
- Bay / carrier files (TransLog, ROC CSV, etc.) — usually one file per bay
- Pipeline daily reports (PDF or CSV)
- Producer LACT spreadsheets (
.xlsx)
Coyote begins automatic file detection after you select the facility and files.
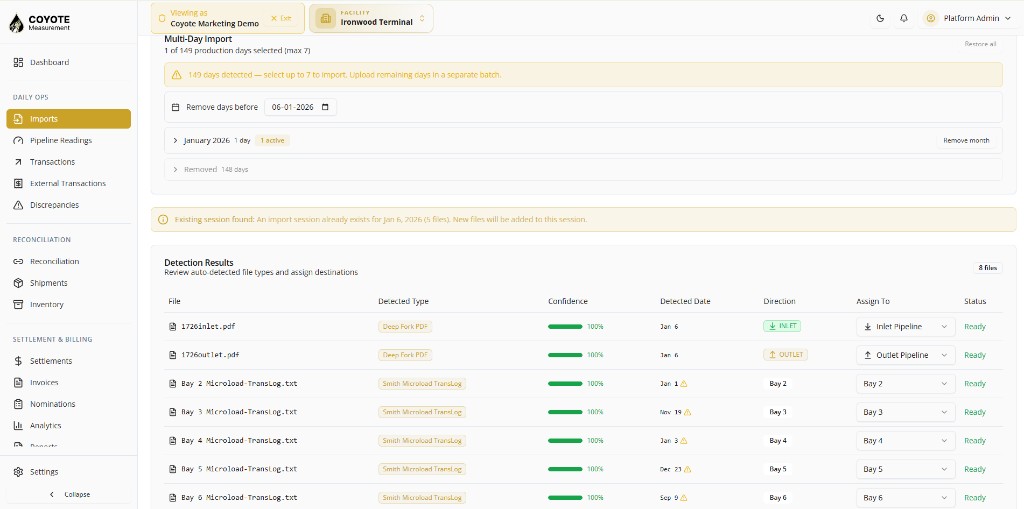
Step 3 — Review file detection
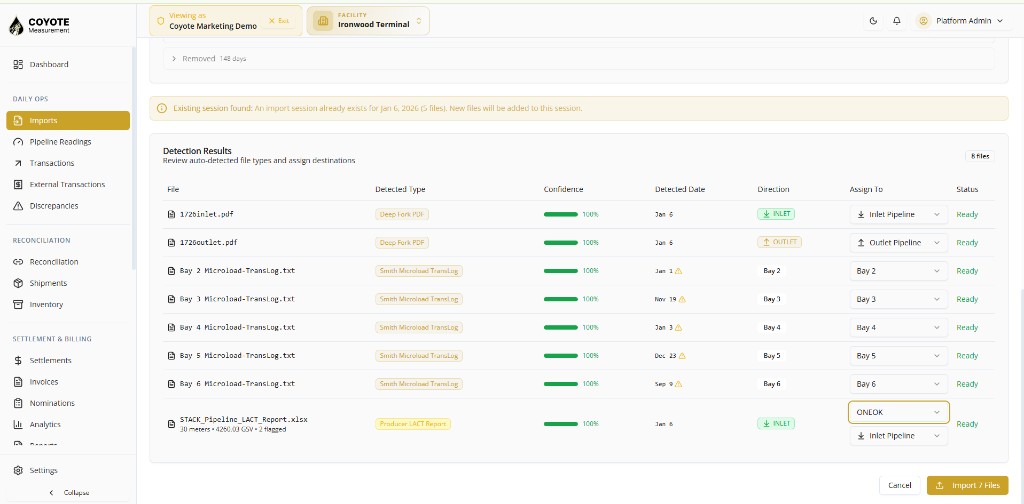
For each file, Coyote shows:
| Field | Description |
|---|---|
| Detected type | Parser to use (for example Smith TransLog, Deep Fork PDF) |
| Category | Bay/Carrier, Pipeline reading, or Producer LACT |
| Suggested bay | Parsed from filename when available |
| Production day | Extracted from file content when possible |
| Confidence | How sure the detector is about the match |
Confirm or adjust mappings
For each file, verify:
- Bay / Carrier files — assign the correct bay. Loading bays create outbound (carrier out) movements; unloading bays create inbound (carrier in) movements.
- Pipeline files — confirm pipeline and direction (in/out) if prompted.
- LACT files — confirm default producer and pipeline settings when shown. Review the LACT preview (meter count, flagged rows) if displayed.
If a file is detected as Unknown, pick the correct type manually or re-export the file from source. See Troubleshooting Imports.
Step 4 — Confirm production day
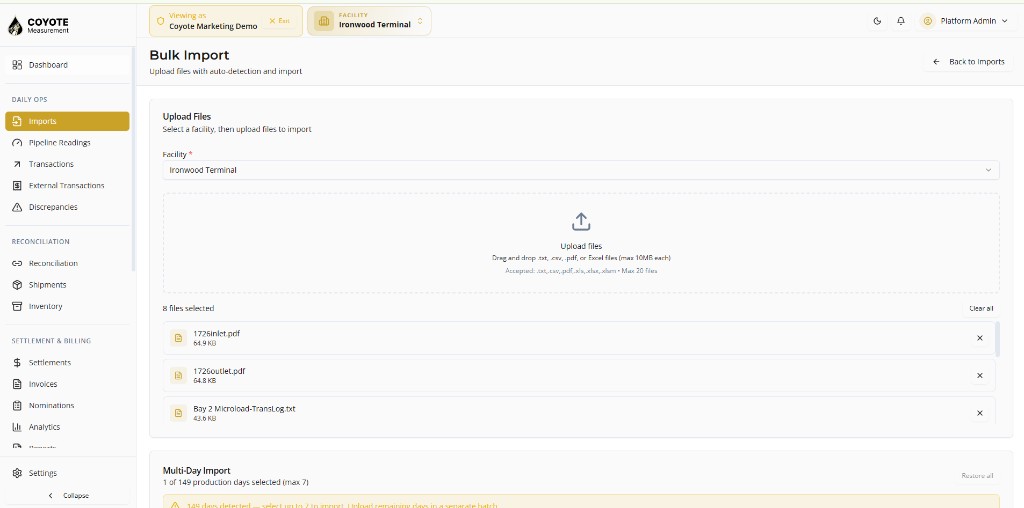
Coyote suggests a production day based on file content.
- Single day — confirm the date and continue.
- Multiple days detected — Coyote lists all days found across your files (up to 7 days per upload). Select which days to import or discard days you do not need.
- Date conflict — if files disagree on the day, pick the correct production day before processing.
Coyote also warns if a session for the same facility and day already exists (active or approved). You can continue into an active session or choose a different day.
Step 5 — Process the import
- Review the summary: file count, categories, and selected production day(s).
- Click Import / Process to start.
- Coyote creates one import session per production day (linked as a group when multiple days are selected).
- Each file becomes a batch inside its session. Files are parsed and validated.
When processing completes, you are redirected to the Import Session page (or the Imports list).
Supported file types
Bay / Carrier
| Type | Extensions |
|---|---|
| Smith Microload TransLog | .txt, .csv |
| Emerson ROC CSV | .csv |
| ABB Totalflow CSV | .csv |
| OMNI Flow CSV | .csv |
| Honeywell CSV | .csv |
| Generic CSV | .csv |
Pipeline readings
| Type | Extensions |
|---|---|
| Deep Fork PDF | .pdf |
| VTScada CSV | .csv |
| OnPing CSV | .csv |
Producer LACT
| Type | Extensions |
|---|---|
| Producer LACT Report | .xlsx |
After upload
- Open the Import Session to review batches, rows, and any warnings.
- Status may show Needs Review if there are discrepancies, unmapped codes, cross-bay tickets, sequence gaps, or LACT flags.
- You may receive an email notification when the import completes or fails (if notifications are enabled for your organization).
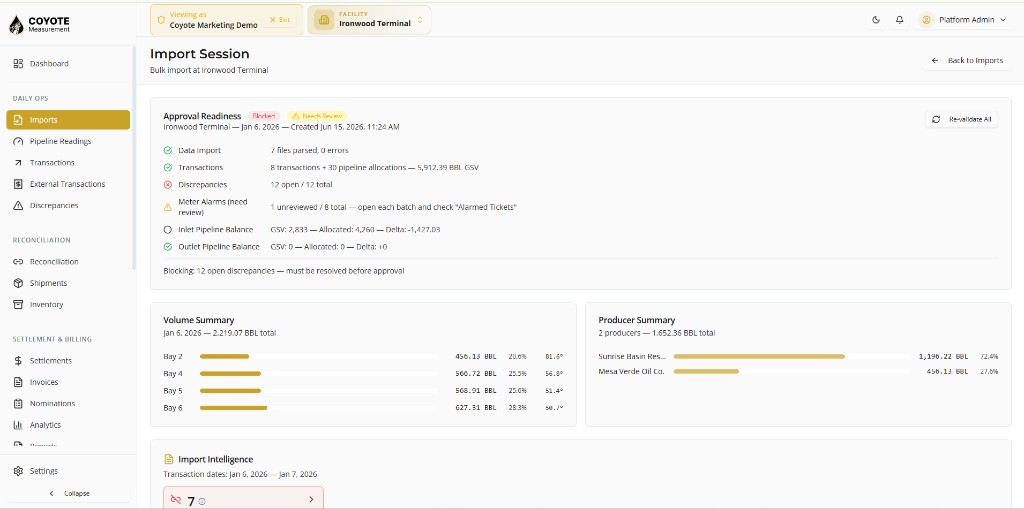
Continue to Reviewing & Validating to approve the session and promote data to live transactions.