

Drivers
Drivers represents your master directory of external transportation operators and logistics personnel. Every terminal check-in, product loading event, or physical ticket generation requires a resolved driver profile to accurately map commercial compliance, CDL certifications, and safety verification protocols.
Open Admin → Drivers in the app (/drivers).
Where to go in the app
Step 1 — Navigate to the drivers page
- In the primary sidebar, navigate to the Admin section.
- Click Drivers.
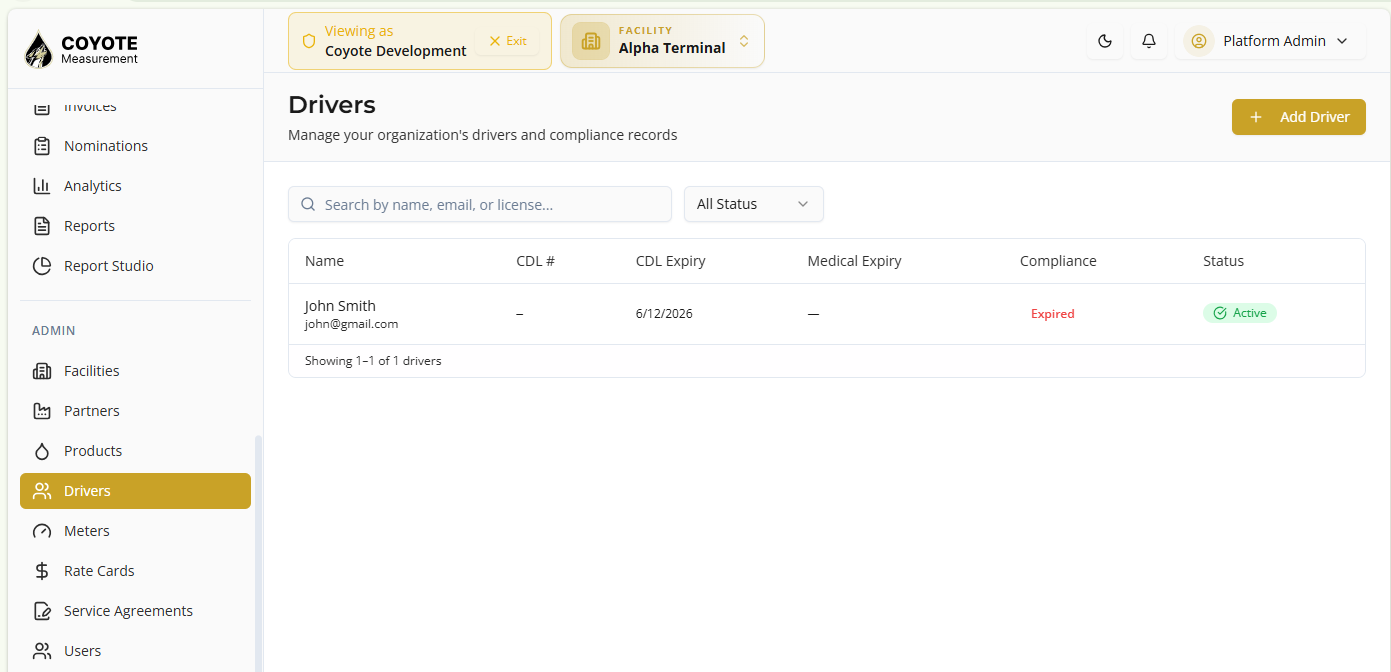
- The drivers list appears displaying all master product entities, their classification types, and current system availability status.
Columns
| Column | Description |
|---|---|
| Name | The full name and email address of the transportation operator (e.g., John Smith). |
| CDL # | The driver’s unique Commercial Driver’s License identification number. |
| CDL Expiry | The expiration date of the driver’s current Commercial Driver’s License. |
| Medical Expiry | The expiration date for the driver’s DOT medical examiner’s certificate. |
| Compliance | The real-time regulatory standing of the driver (e.g., Expired, Compliant). |
| Status | The current operational state of the profile within the terminal system (e.g., Active). |
Filters & Views
| Control | Use for |
|---|---|
| Search by name, email, or license… | Filter the driver directory by typing specific personal or credential attributes. |
| Status Dropdown | Narrow down the table list by selecting a specific compliance or registration state (defaults to All Status). |
| Add Driver | Opens the registration dialog wizard to onboard a new driver and input their compliance credentials. |
Step 2 — Create a new driver
- Click Add Driver in the top right.
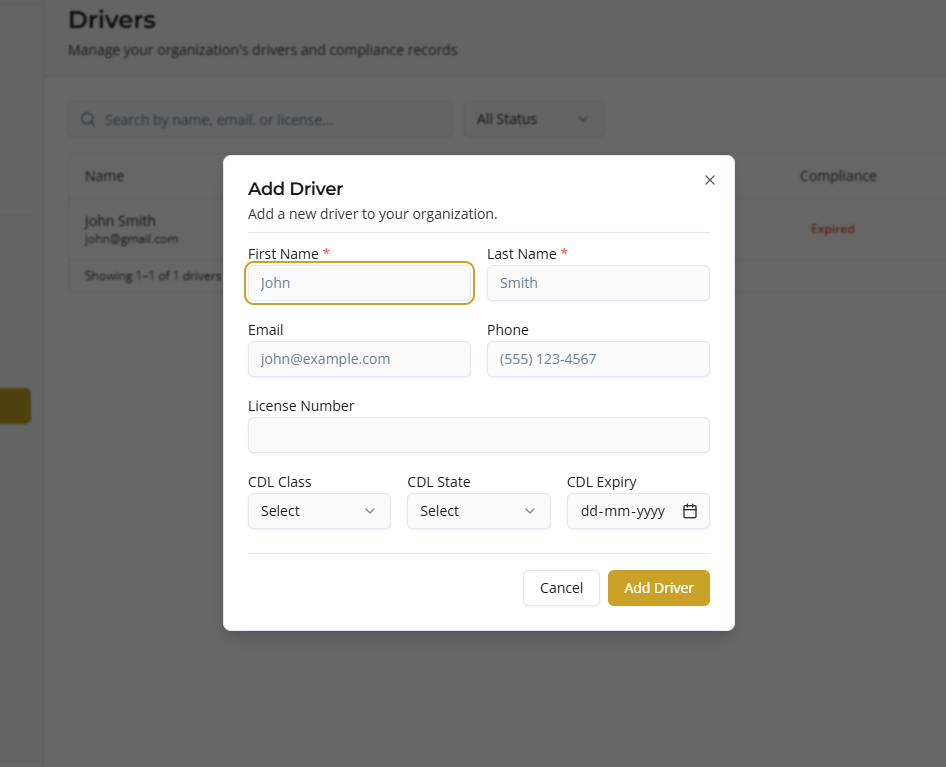
- The Add Driver dialog box opens overlaying the screen.
- Enter the driver’s name in the First Name and Last Name fields.
- Enter the communication details in the Email and Phone fields.
- Enter the license credentials in the License Number field.
- Select the driver’s credential levels using the CDL Class dropdown.
- Select the issuing state from the CDL State dropdown menu.
- Click into the CDL Expiry field to input or select the license expiration date.
- Review the details and click the yellow Add Driver button at the bottom to save successfully.
Step 3 — View Driver and further operations
- From the drivers directory list, click any specific driver row or name to open its comprehensive details page.
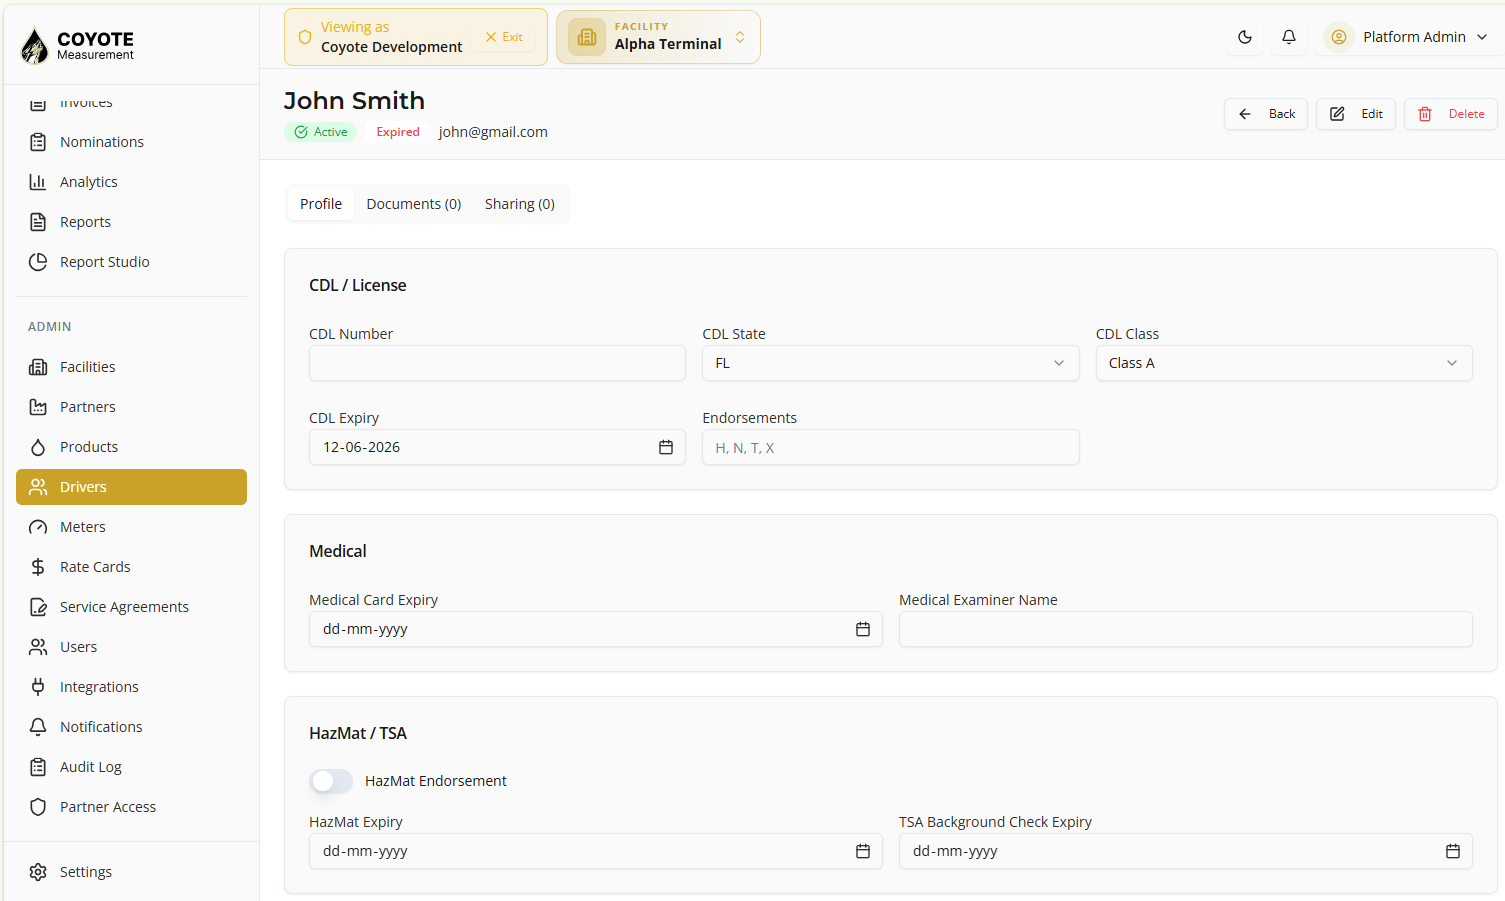
- Three configuration and tracking tabs will display: Profile, Documents, and Sharing.
Profile Tab
The Profile contains multiple structured breakdown cards detailing core compliance, training, and operational logistics:
CDL / License: Displays critical operator credentials including the CDL Number, CDL State, CDL Class (e.g., Class A), CDL Expiry date, and any specific cargo Endorsements (e.g., H, N, T, X).
Medical: Tracks health compliance with inputs for the Medical Card Expiry date and the certified Medical Examiner Name.
HazMat / TSA: Features a HazMat Endorsement toggle switch along with tracking for HazMat Expiry and TSA Background Check Expiry timelines.
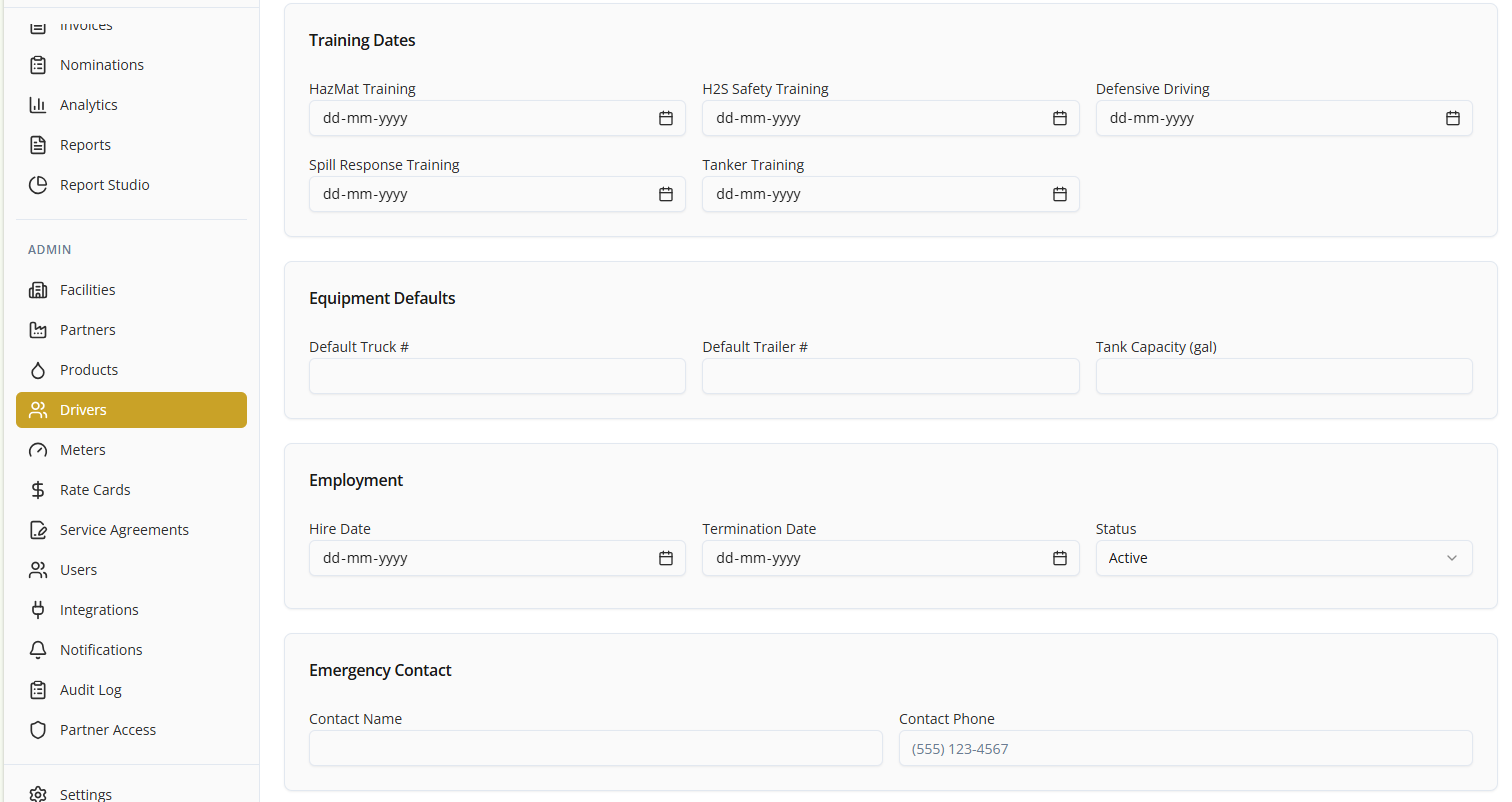
Training Dates: Tracks safety and training program milestones including HazMat Training, H2S Safety Training, Defensive Driving, Spill Response Training, and Tanker Training dates.
Equipment Defaults: Allows assignment of vehicle assets directly to the driver by specifying a Default Truck #, Default Trailer #, and the standard Tank Capacity (gal).
Employment & Personal: Tracks onboarding metadata including Hire Date, Termination Date, global system Status (Active, Inactive, Terminated, On Leave), Date of Birth, and internal operational Notes.
Emergency Contact: Keeps primary emergency details accessible with fields for Contact Name and Contact Phone.
Personal: Add personal details, Date of Birth and Notes.
Click Save Profile to update the details.
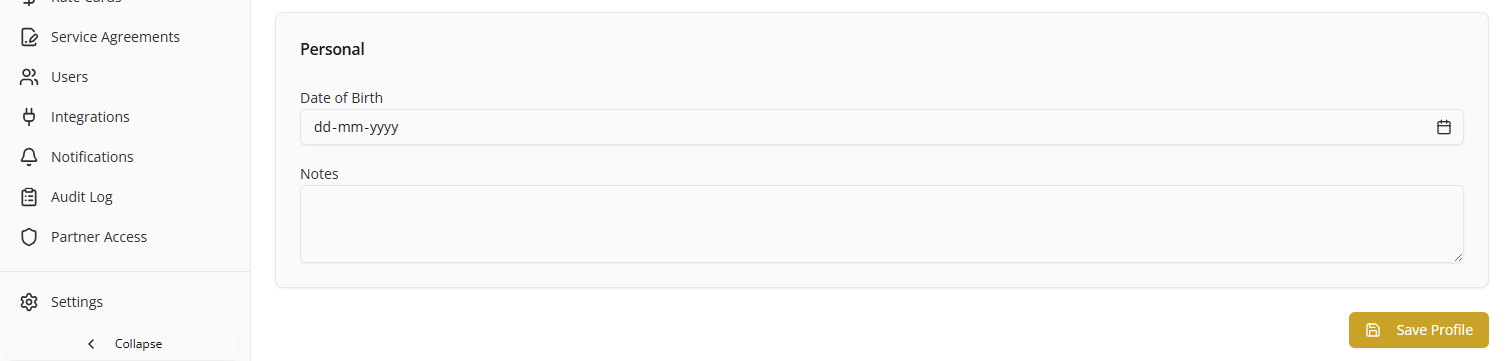
Modifying Profile Details
- Click the Edit button in the upper right corner to activate form inputs.
- Adjust any relevant credentials, toggle states, or expiration dates.
- Scroll to the bottom of the page and click the yellow [Save Profile] button to finalize changes.
Deleting a Driver
- Click the Delete button in the upper right corner of the profile page.
- Confirm the prompt to permanently remove the driver profile from the master directory.
Documents Tab
- Click the Documents tab from the driver profile sub-navigation menu to manage external compliance files or certification records for the driver.
- The tab shows a real-time counter of total items currently uploaded (e.g., Documents (0)).
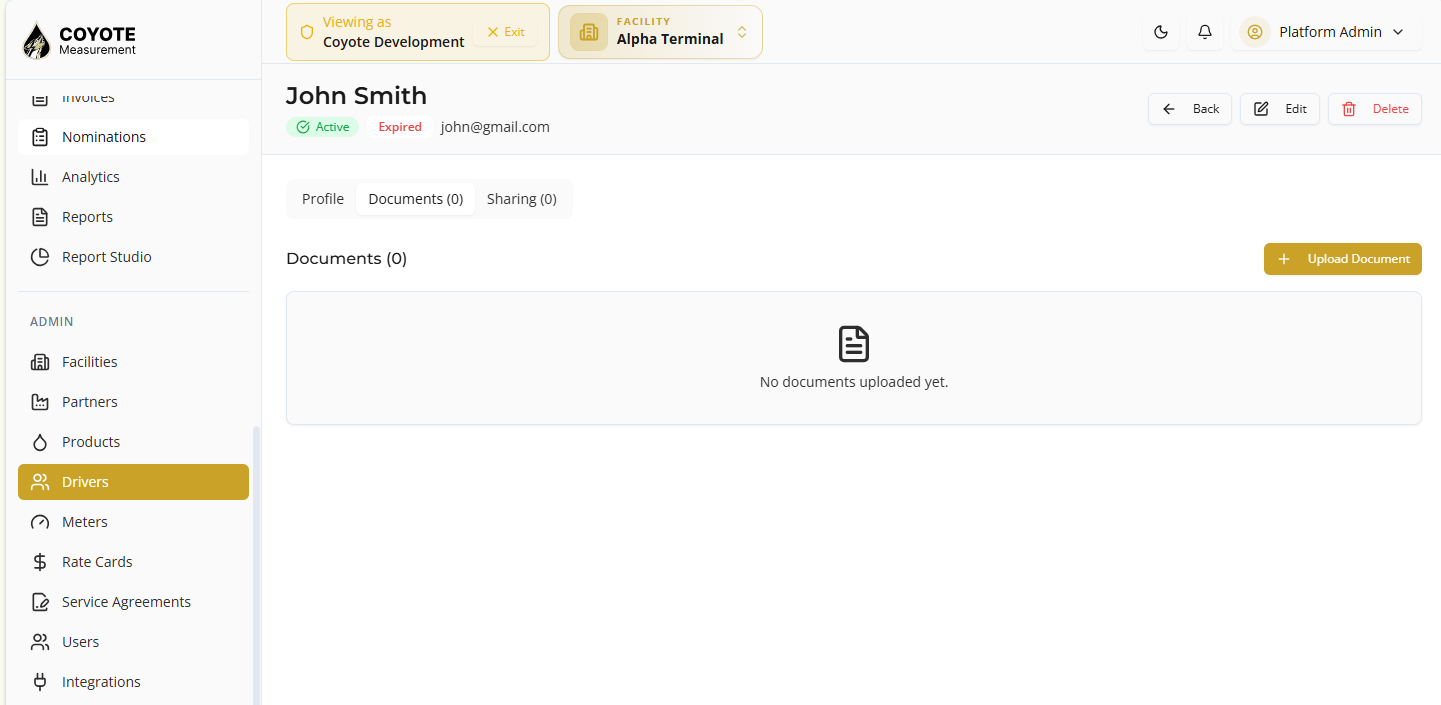
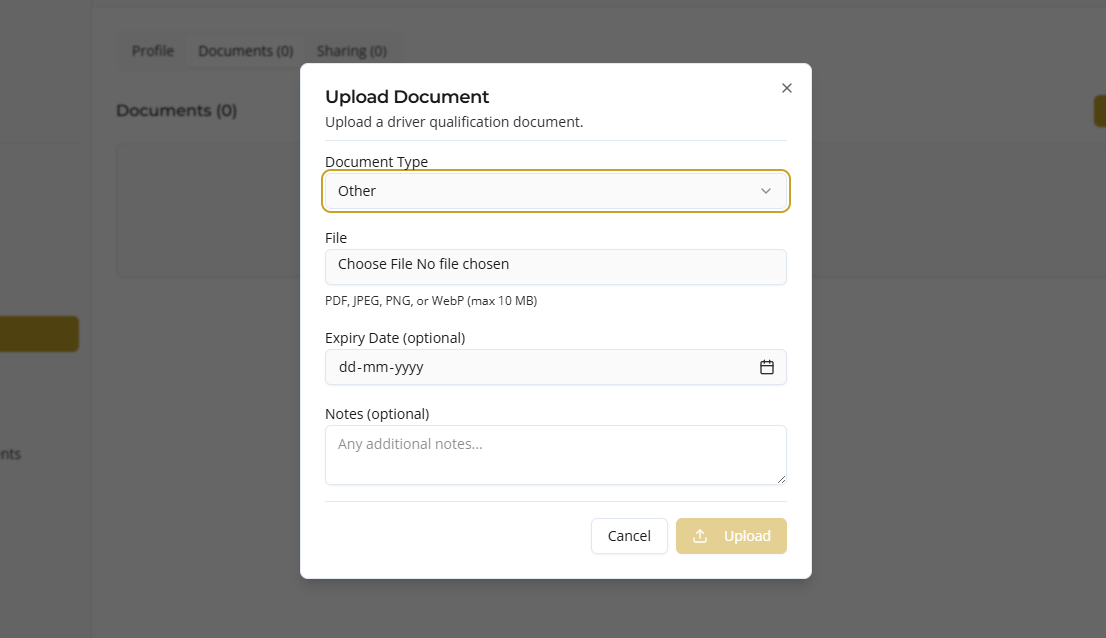
Uploading a Driver Document
- Click the Upload Document button on the right side of the section header.
- The Upload Document dialog panel will overlay the screen.
- Select the Document Type from the dropdown menu (e.g., Tanker Training, Medical Card, CDL Copy, etc).
- Click Choose File to select a digital copy from your local device (supports PDF, JPEG, PNG, or WebP up to 10 MB).
- (Optional) Click into the Expiry Date field to input or select the document’s validation deadline.
- (Optional) Enter any internal context in the Notes text area.
- Click the Upload button to submit and save the document to the driver’s master profile.
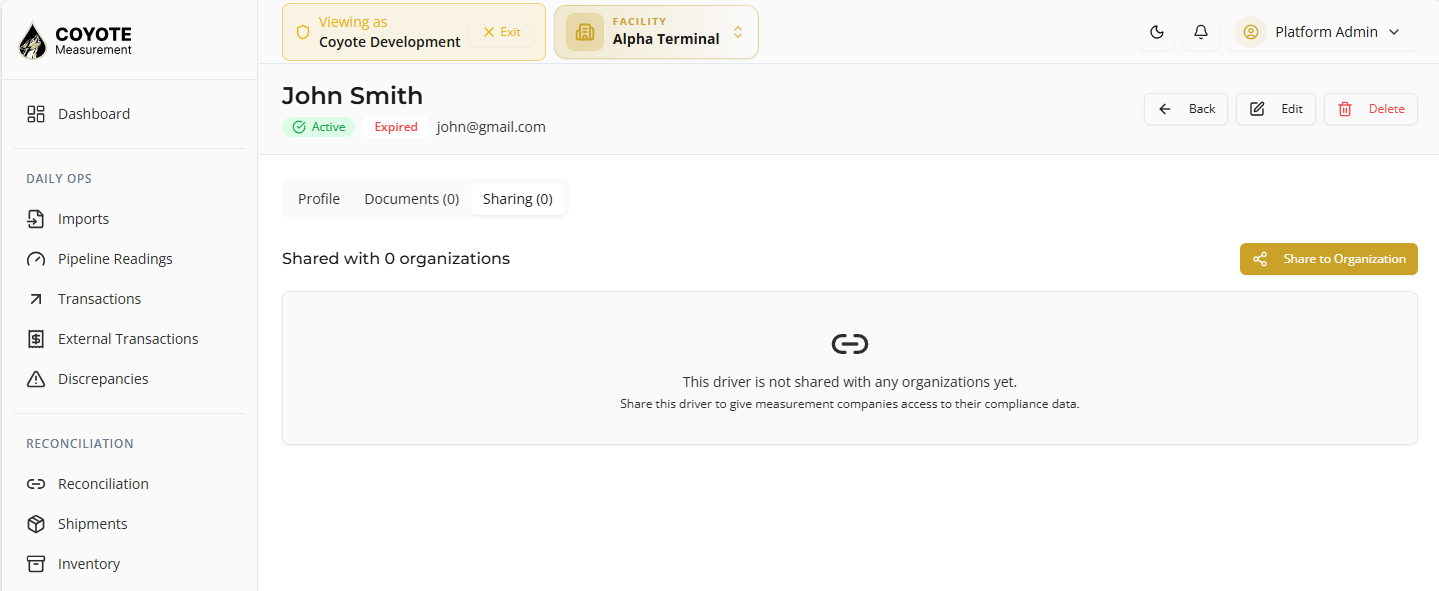
Sharing Tab
- Click the Sharing tab from the driver profile sub-navigation menu to manage external visibility or third-party access links associated with this specific driver profile.
- The tab displays a real-time counter of total active shares (e.g., Sharing (0)).
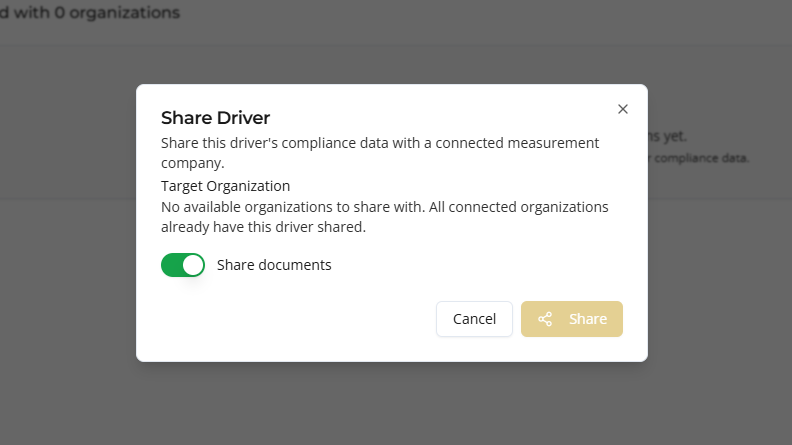
Sharing a Driver with an Organization
- Click the Share to Organization button on the right side of the section header.
- The Share Driver dialog panel will overlay the screen.
- Select the target external company or carrier from the Organization dropdown menu.
- Use the date selector to establish an Expiration Date for the shared data access.
- Click the Share button to authorize and finalize the compliance data link.
Related topics
- Overview — facilities and partners
- Facilities — step-by-step facilities
- Partners — step-by-step partners
- Products — step-by-step products